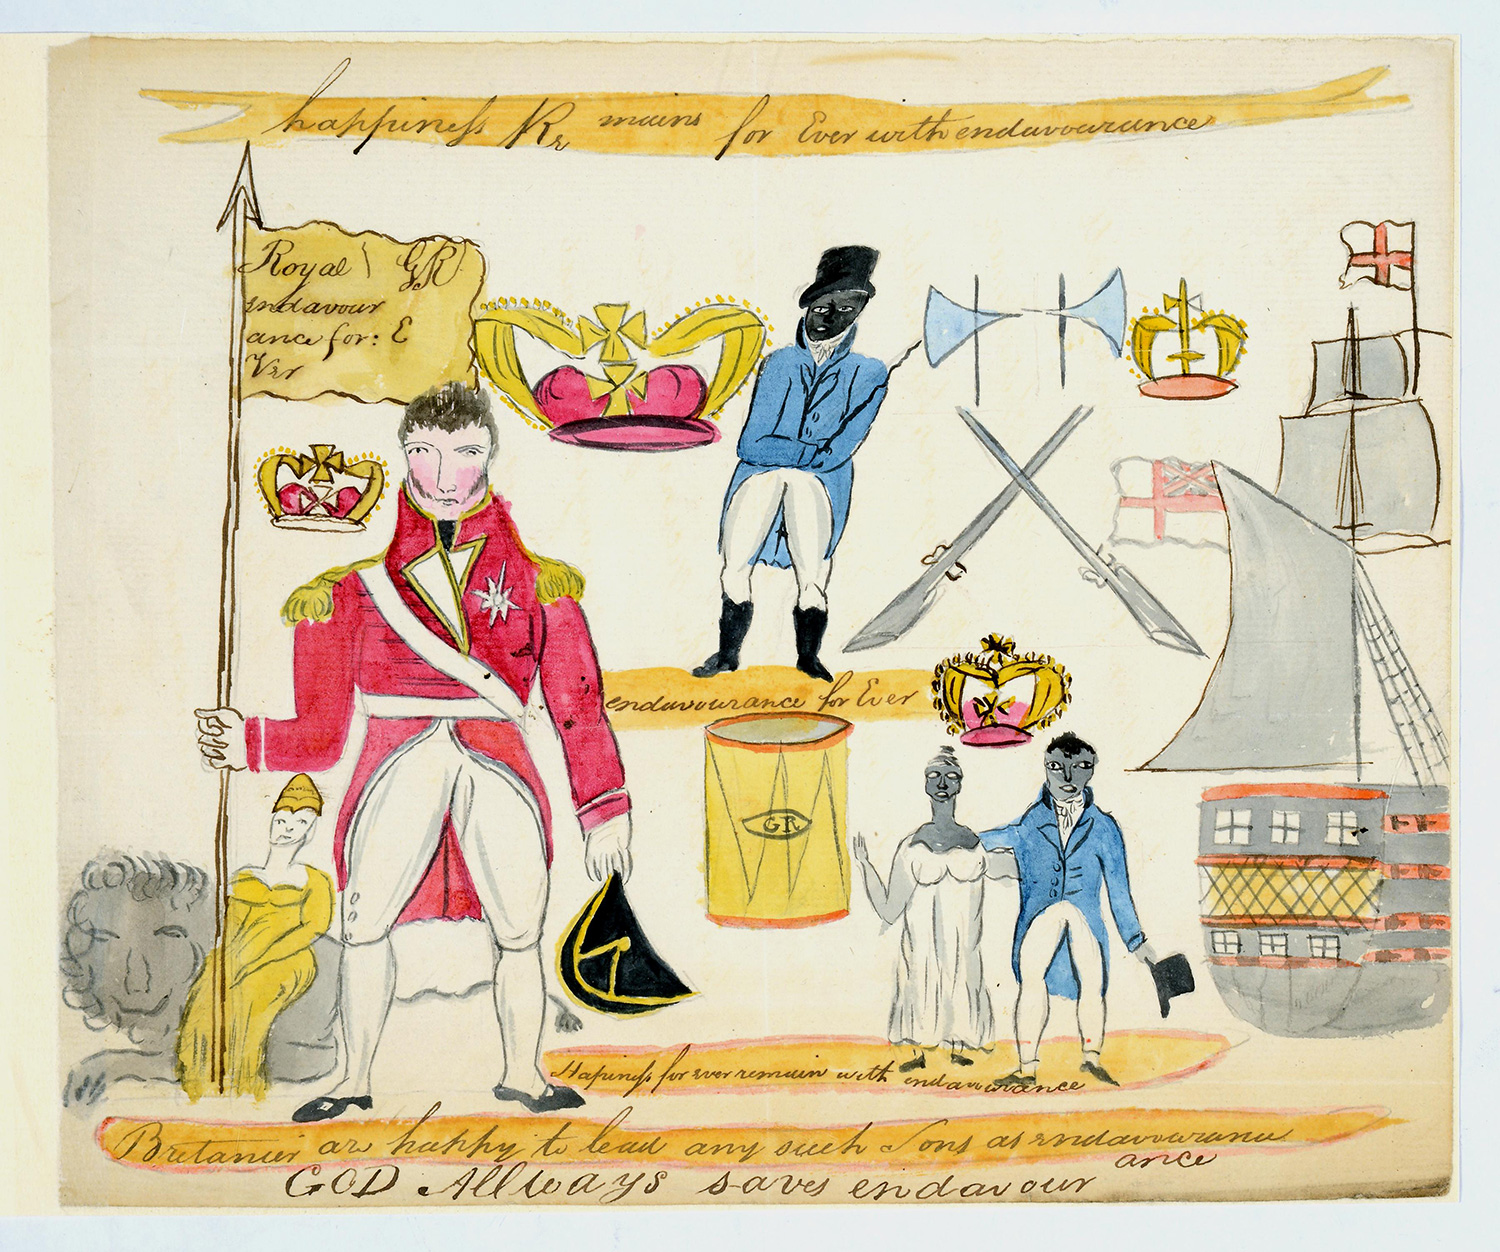
Resistance among enslaved Africans began the moment they were captured, and took many different forms. Some chose to do the following:
- speak their native language in private
- perform African rituals like drumming
- appear to accept Christianity, but secretly practise their religion
- run away
- poison their masters
- pretend to be sick in order not to work
- damage tools or machinery
Many Africans also showed their resistance through rebellion. The most successful rebellion took place in Haiti in 1791. Here, the enslaved population drove out the French and British and set up the first black republic. In Jamaica, a group of Maroons, or runaway Africans, formed their own settlements in the mountains. For the next 150 years they fought against the British and helped to free others.
Slave rebellions tended to be less threatening in Barbados than on other Caribbean islands. Barbados had a well-armed police force and there was nowhere to hide. Unlike Jamaica, which still had forests, most of the land in Barbados had been cultivated to produce as much sugar as possible.
On Sunday 14 April 1816 a major rebellion broke out in Barbados. This rebellion was carefully planned and organised by the senior enslaved men and women who worked on several estates and plantations.
The rebellion started in the evening in the southeast parish of St Philip, spreading to most of the southern and central parishes of Christ Church, St John, St Thomas, St George and parts of St Michael. Three days later it was put down by the local militia (soldiers) and the imperial troops (the King’s troops) stationed on the island. Martial law (army rule) was declared on Monday 15 April, and was lifted on 12 July. Use this lesson to explore original documents how the British authorities responded to the rebellion of the enslaved in Barbados.
How and why did the enslaved Africans of Barbados rebel in 1816?
An African-born enslaved man called Bussa led the rebellion on Barbados. Very little is known about him, except that he was a ranger at the Bayley plantation in St Philip. A ranger was the head officer among the enslaved workers on an estate. He would have to look after boundaries and fences and deal with the day-to-day business arising between the estates. This meant that rangers travelled throughout the area. It is likely that Bussa enjoyed the confidence and respect of both the black community and plantation owners.
Bussa planned the uprising with people from the different estates. This included Jackey, the driver at the Simmons estate, King Wiltshire, a carpenter at Bayley’s and Nanny Grigg, a literate domestic at Simmons.
The uprising started at Bayley’s estate. It was an attempt by the enslaved people to change the society on Barbados. They believed that Barbados belonged to them and wanted their freedom from the plantation owners.
The act to end the slave trade had been passed in Parliament in 1807. In 1815 the slaves thought that they were going to gain their freedom when Governor Leith returned from Guadeloupe, another Caribbean island. They believed that he was bringing a ‘free paper’ with him to set them free.
Bussa commanded about 400 men and women against the troops. These included the West India Regiment, an all black branch of the British Army. He was killed in battle and his troops continued to fight until they were defeated by superior firepower. One white civilian and one black soldier were killed during the fighting. Compared to this, 50 enslaved people died in battle and 70 were executed in the field. Another 300 were taken to Bridgetown for trial, of which 144 were executed and 132 sent away to another island.
Bussa’s rebellion was one of many rebellions that took place in the Caribbean over the centuries, showing black people’s determination to gain their freedom. Rebellion was their attempt to influence the abolition movement.
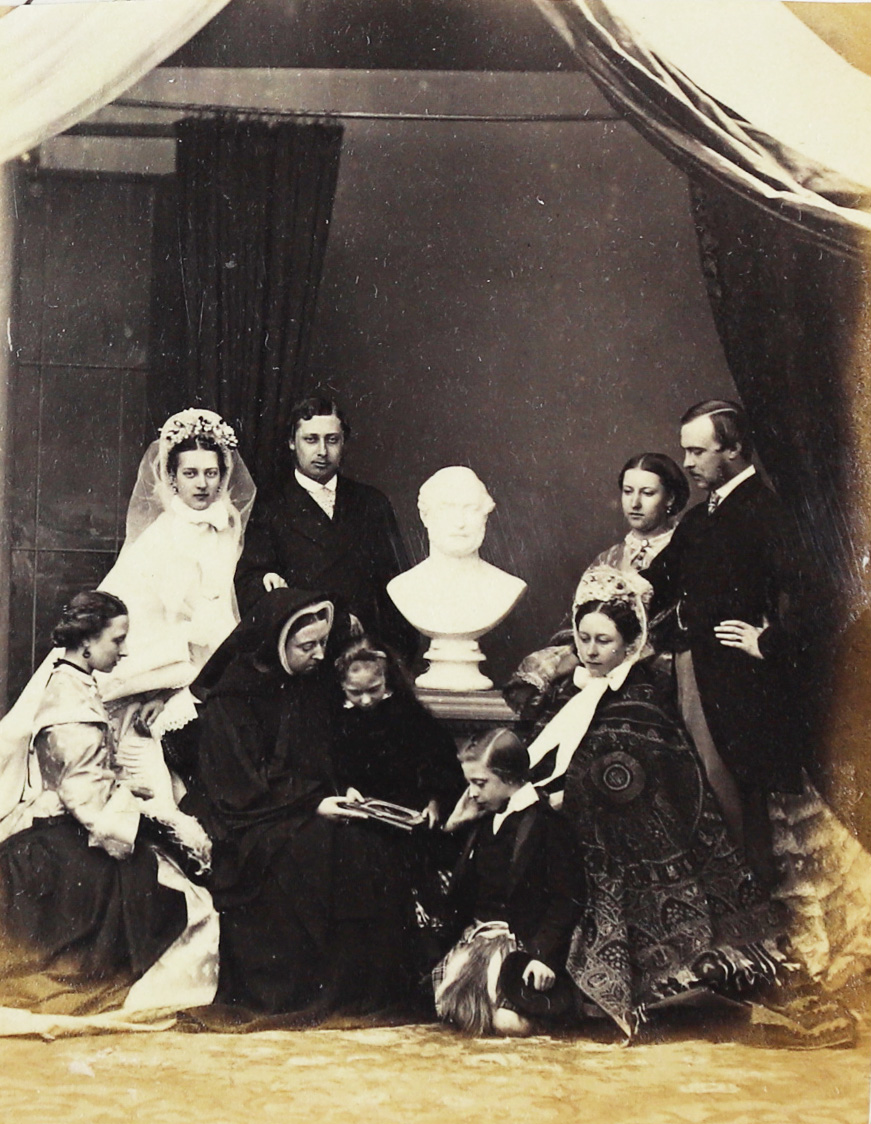
If you and your family were going to have your photograph taken it probably would not take that much time to arrange. Cameras are small and photos can be taken instantly.
However, in the 19th century having your photo taken was quite different. A photographer would come to your house to take the photograph – usually on a special occasion, like a wedding. The group would pose carefully and everyone in the photo would have to remain very still for some minutes.
Use this lesson to find out more from a photograph of Queen Victoria and some of family. What can we learn about the occasion?
What can Queen Victoria's family photographs tell us?Queen Victoria was married to Albert for nearly 21 years and was very much in love with him. She did much to please her husband, giving him the title ‘Prince Consort’ in 1857 and letting him take some responsibility in the running of the country. Victoria and Albert had nine children:
- Victoria (born 1840)
- Edward (born 1841)
- Alice (born 1842)
- Alfred (born 1844)
- Helena (born 1846)
- Louise (born 1848)
- Arthur (born 1850)
- Leopold (born 1853)
- Beatrice (born 1857)
Both Victoria and Albert spent a lot of time with their children at Balmoral in Scotland and Osborne House on the Isle of Wight. In 1861 Queen Victoria’s husband Albert died. Victoria was devastated. She went into mourning. She wore black for the rest of her life and for many years locked herself away from the public. The wedding of Prince Edward to Princess Alexandra of Denmark took place two years after the death of Prince Albert. Clearly Queen Victoria was in no mood for celebrations. She could not even face the wedding reception without Albert, so she had lunch alone.
By the 1860s family photographs had become quite common in Victorian England. Successful photographic experiments had first been carried out in the 1820s but the ability to photograph people did not arrive until the work of Louis Daguerre and Henry Fox Talbot in the 1830s. Even though photography was now familiar it was still a slow process. Cameras were large and heavy and had long exposure times (the time the film had to be exposed to light) meaning that people had to stay very still throughout a session with a professional photographer. Only with the invention of simple hand held cameras in the early 1900s could ordinary people take their own ‘snaps’.
The RAF (Royal Air Force) played an important part in the war with Germany. In 1940, Britain was the only country left to fight Germany. Prime Minister Winston Churchill refused to give in when Germany started to attack Britain in July. The RAF helped protect Britain from German fighter aircraft. This huge air battle was called ‘The Battle of Britain’.
The Luftwaffe (German Air Force) bombed many of Britain’s towns and cities from 7 September 1940. They wanted to destroy as many factories, railways, ports and people’s homes as possible. This was known as the ‘Blitz’ which lasted until May 1941.
Fighting between the two air forces carried on until the end of the war. The RAF dropped bombs on German towns and cities. At the time, this was the main type of fighting between the two countries.
Men and women joined the Royal Air Force. It was divided into different groups (squadrons). There were also pilots from New Zealand, Canada, Australia and South America. Women were not allowed to fly but they worked in the RAF control centres.
Gordon Ford was a member of New Zealand Squadron 75. In his squadron many of the airmen came from New Zealand. They lived at Feltwell in Norfolk whilst they carried out their flying missions.
Over 47,000 airmen were killed on bombing missions and nearly 8,500 injured from 1940 to 1945. Use this lesson to find out about the story of Gordon Ford, one of the men who survived.
What was it like to be an airman in the Second World War?Gordon Ford was a wireless operator in New Zealand Squadron 75. It was the first Commonwealth squadron. Their motto was ‘Ake Ake Kia Kaha’ which means ‘forever and ever be strong’.
Squadron 75 was a bomber unit within RAF Bomber Command. Airmen flying for the squadron were expected to live for only six weeks. The squadron carried out bombing missions over Germany and Italy in the early years of the war. At this time they flew Wellington aeroplanes.
At the end of 1942, Squadron 75 started flying Stirling aeroplanes. The squadron took part in the Battle of the Ruhr, the bombing of Hamburg and an attack on the German V-weapon station at Peenemunde where new kinds of ballistic missile (including the V-2 rocket) were developed and tested.
By 1944, Squadron 75 began to take part in attacks against German factories, railways and bridges. They now used Lancaster aircraft because they were faster and could carry more bombs. The squadron also helped to lay mines. To help the people of Holland, they dropped food parcels to starving people in the Hague.
Gordon Ford joined the RAF when he was 18 years old and trained as a pilot. He was declared unfit for pilot duties when he broke his wrist and trained as a wireless operator instead. He was 19 years old when he flew his first mission and he always made sure he had his lucky mascot with him – a doll of a little Scotty dog called ‘Whisky’.
Gordon Ford later became a member of the Air Training Corps and the Home Guard. He was also a firewatcher during the air raids on his hometown of Sunderland.
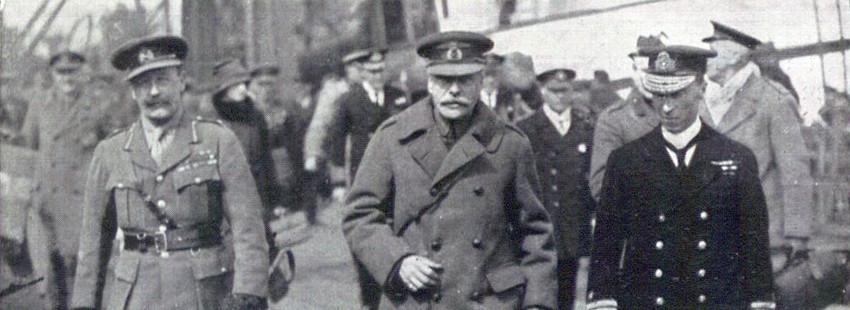
In the spring and summer of 1918, Allied forces came under dangerously sustained attack from the Germans. Commanders were not confident of their ability to defend against this assault but the line did hold. In July, the Allies counter-attacked and for the first time in the conflict began to push the Germans back. On 8 August they won a significant victory at Amiens and the Germans were forced to retreat to the Hindenberg Line, a well-defended trench system established in 1917. By 3 October the German High Command were requesting an armistice and this famously came into effect at 11am on the eleventh day of the eleventh month, 1918.
Historians agree that the major victories in the last ‘hundred days’ were mainly won by Field Marshall Haig and the British Army. But Haig’s final victory presents the historian with a problem. The British High Command during the First World War is traditionally seen as totally incompetent. But if Haig and his generals were so inadequate, how did they manage to win the war?
The whiteboard resources below will examine this question.
Butcher of the Somme or hero of Amiens?The caricatures of British generals during the First World War as incompetent and unfeeling are very familiar. From Oh What a Lovely War to Blackadder Goes Forth, popular culture has alternately attacked and ridiculed their lack of tactical imagination and consistently over-optimistic view of the conflict.
The emphasis on British commanders eclipses the bizarre statements frequently made by the Kaiser during the conflict and overlooks the fact that strategy on the Western Front was heavily influenced by the French. But in the popular imagination the grim statistics of the First World War (on average around 5,000 soldiers were killed for every single day of the war) and the perceived pointlessness of many of the assaults combined to produce a picture of a British High Command, presided over by Douglas Haig, almost more dangerous than the enemy. This was not necessarily the view during and immediately after the war.
The most obvious signs of this are Haig’s treatment after the Armistice. He was made an Earl in 1919 and a Baron in 1921, the year of his retirement as Commander in Chief of the British Home Forces. It was not until years later that voices began to be raised against the tactics employed during the conflict. Some of the most vigorous statements were made by David Lloyd George.
Writing in 1938 the former Prime Minister aggressively planted the blame for the destructiveness of the conflict on his General’s ‘narrow, selfish and unimaginative strategy and…the ghastly butchery of vain and insane offensives’. However, in blaming his own High Command, Lloyd George neatly shifted the responsibility for the conflict from Britain’s political class who had brought Britain into the war and overseen it.
And yet the manner of the 1918 victory clearly demonstrates the military mistakes of the earlier years of the war. The historian David Stephenson has written of a ‘new willingness to terminate attacks in good time’, emphasising the old tendency to press assaults long after the position had become hopeless. The rise of new generals such as Henry Rawlinson and John Monash came at the expense of old, ‘bad’ generals such as Hubert Gough, sacked in March 1918.
A serious problem that Haig had to contend with was the poor quality of ammunition supplied for much of the war by British factories. Shells would either not explode with sufficient force or not explode at all. And yet, even when this became clear, Haig continued to put far too much faith into the power of aerial bombardment and he consistently underestimated German defences. It took years for the British High Command to learn these lessons and to develop effective ways to use the new forms of military equipment available to them – aircraft, tanks and gas weapons.
The final German assault, which culminated in the Spring of 1918, very nearly succeeded. American forces were vital in holding the line but it was the British who took the lion’s share of territory and prisoners, no doubt in part thanks to Haig’s still inspiring leadership. But in the end the collapse of the Central Powers was unexpected. In October 1918, Haig told the War Cabinet that Germany would fight on into 1919. He was wrong again.
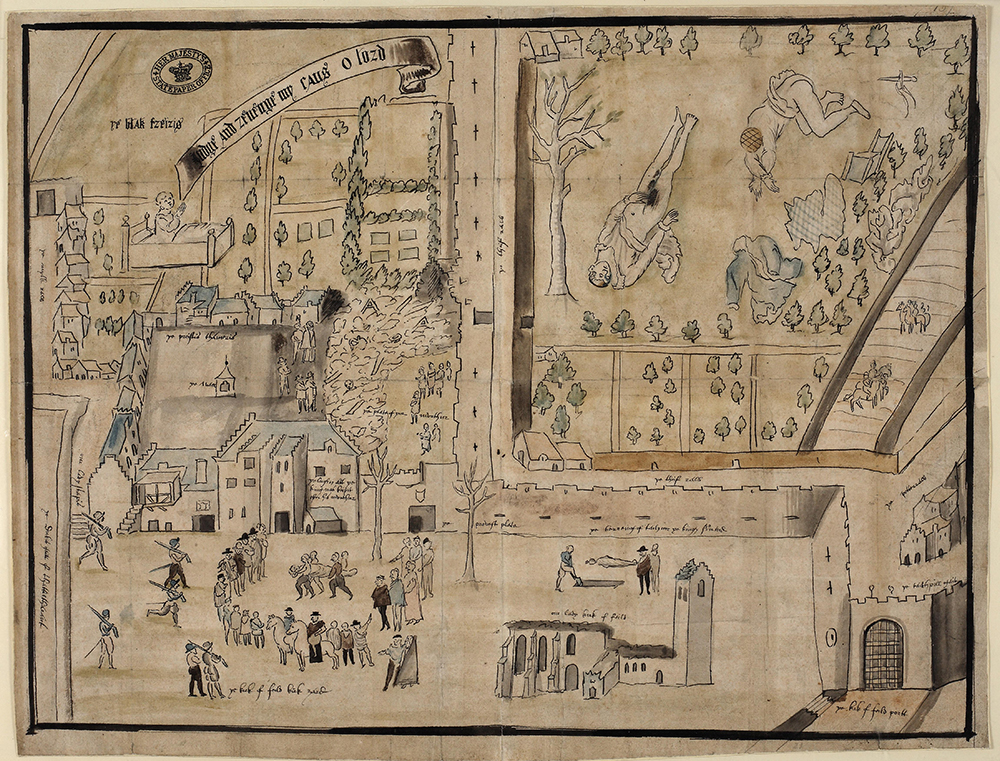
Early in the morning of 10 February 1567, Kirk o’ Field house in Edinburgh was destroyed by an explosion. The partially clothed bodies of Lord Darnley, the second husband of Mary, Queen of Scots, and his servant were found in a nearby orchard, apparently strangled but unharmed by the explosion.
Suspicion immediately fell upon Mary and James Hepburn, Earl of Bothwell, one of her closest and most trusted noblemen. Although Bothwell was considered to be the lead conspirator, he was found not guilty at his trial in April, 1567. Mary married Bothwell the following month, just three months after Darnley’s murder.
Darnley’s death remains an unsolved historical mystery. Use this lesson to see if you can work out from the original documents what happened to Lord Darnley.
What happened in 1567?The story of Mary Queen of Scots and her marriage to Lord Darnley shows both the romantic and the brutal side of politics in the 16th century.
In 1565 Mary married Lord Darnley, a Catholic, and great-grandson of Henry VII. Although handsome and elegant, Darnley was weak, vain and spoilt. He soon made himself very unpopular among the Scottish nobles and Mary soon grew to hate his bullying ways. She began to spend most of her time with David Rizzio, her secretary, and this stirred the jealousy of Darnley.
On 9 March 1566 Mary was having supper with David Rizzio when her husband burst in. Rizzio was dragged from the room and killed. Over 50 dagger wounds were counted on his body. Meanwhile Mary was held captive by her husband and forced to make him king in his own right. Mary had few people to turn to during this time except James Hepburn, the Earl of Bothwell.
On 16 June Mary gave birth to a son: James. Mary and Darnley seemed to have made up. Their son´s birth was very important because not only was he heir to the Scottish throne, but he was also the heir to the English throne.
Early the following year, Mary managed to persuade Darnley that she had forgiven him for the murder of Rizzio. Darnley was sick and decided to stay at at Kirk o’ Field House in Edinburgh. On the night of 10 February, Mary left to attend a wedding party while Darnley stayed at home. At about two am, a massive explosion reduced Kirk o’ Field House to rubble. Darnley was killed, but not by the explosion. He was found half-naked – not in the rubble of the house, but in the garden outside the town walls. Something had frightened him so badly that he had escaped from the house before it exploded, but someone saw him fleeing, caught up with him, and strangled him.
The list of suspects was long, because Darnley had many enemies. However, many people suspected that Mary and her friend Earl Bothwell had arranged the murder. When Mary married Bothwell three months later it looked as though the suspicions were right. The Scots rose in rebellion. Mary was driven out to England and her infant son James was made king. Elizabeth I took her prisoner – and a prisoner she stayed for the next 19 years.
Meanwhile, in 1568, a group of Scottish Earls ‘found’ a number of letters in a silver casket, supposedly written by Mary to Earl Bothwell. The letters seem to show that Mary was in love with Bothwell and was planning to murder her husband.
By March 1936 Germany had already re-occupied the Rhineland against the terms of the Treaty of Versailles and Locarno Pacts. Italy and Germany had also formed the Rome-Berlin Axis in October 1936 which meant that Mussolini and Hitler had promised to support each other in event of war.
A month later Germany and Japan had signed the Anti-Comintern Pact directed against the Soviet Union. Italy left the League of Nations in 1937 and joined the Anti-Comintern Pact in the same year.
Use the documents in this lesson and to find out about differences between British politicians in the Conservative Government over foreign policy before the outbreak of the Second World War.
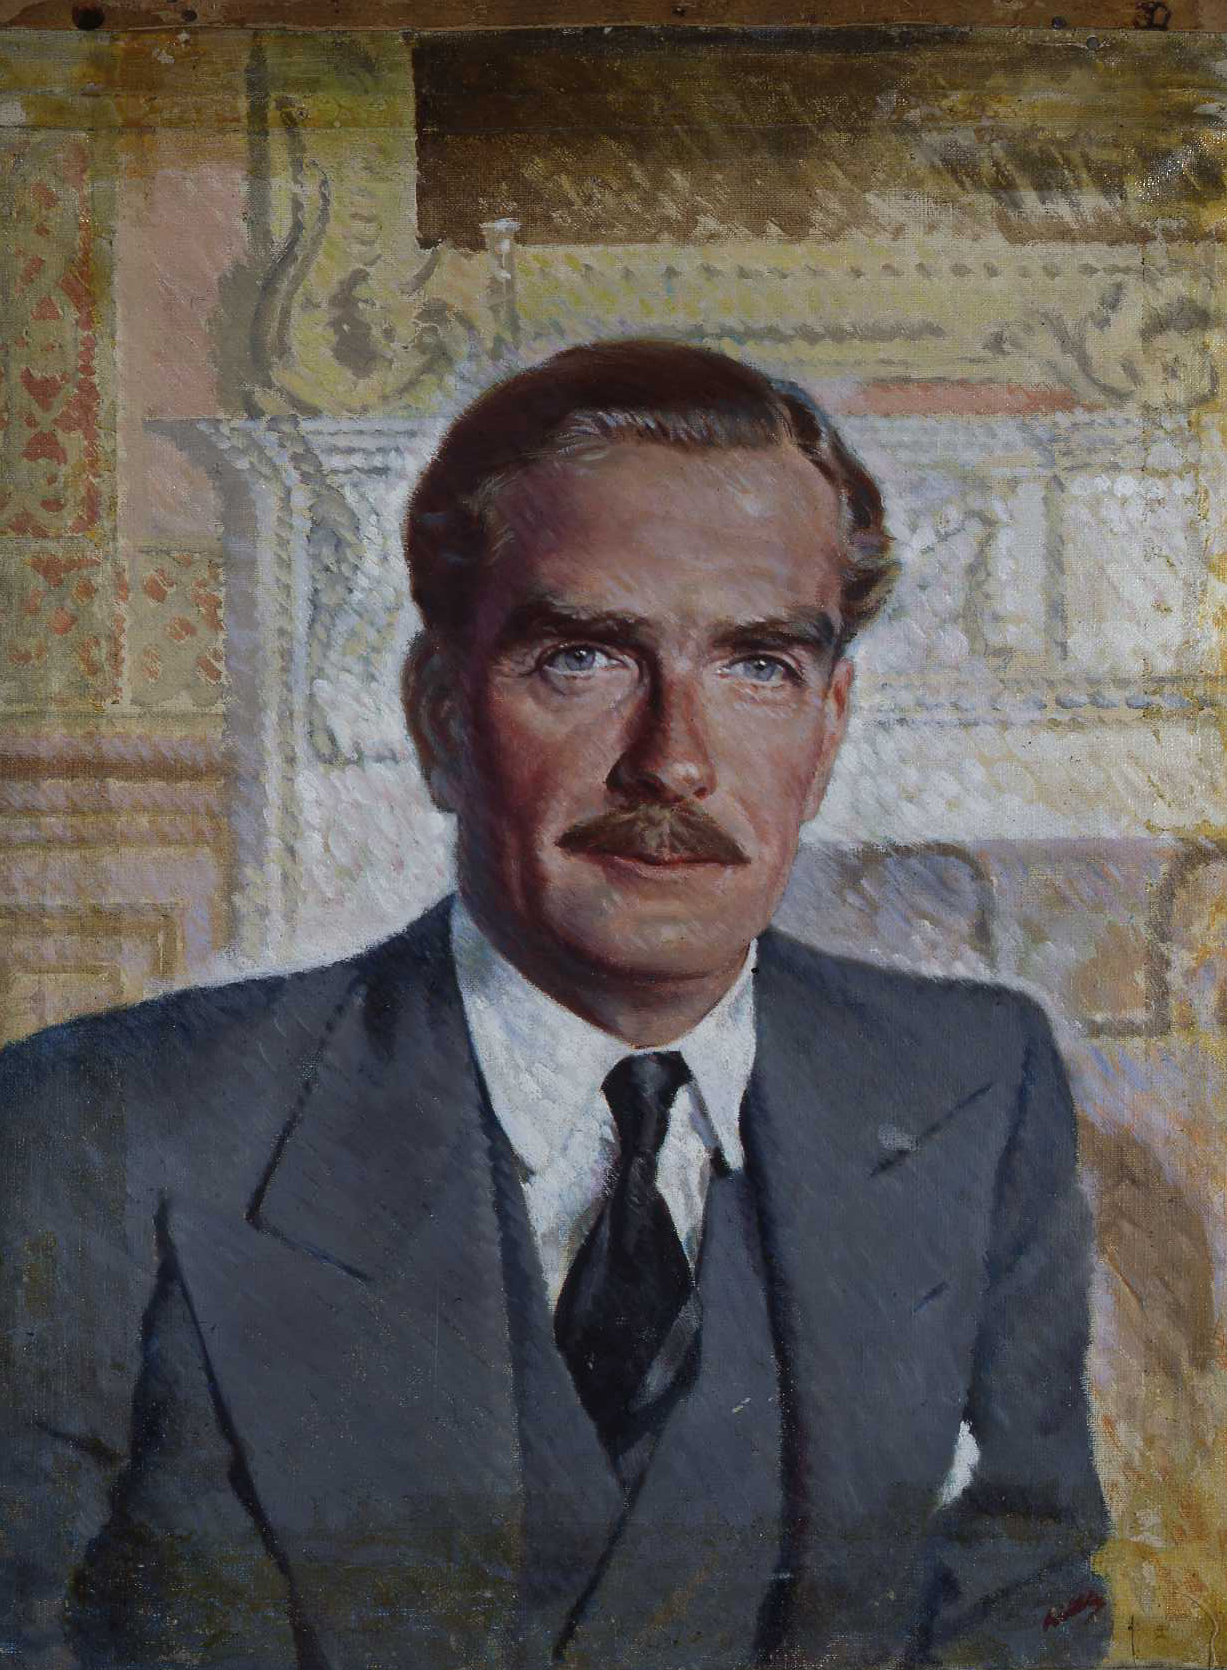
Why did Anthony Eden resign in 1938?When Eden writes that 1938 will be difficult year, he might be referring to Italy’s resignation from the League of Nations just three weeks previously. Eden mistrusted Italy almost more than Germany though he was certainly aware of the growing German threat.
Britain was also concerned about her possessions in the Far East: Hong Kong, Malaya and Singapore. The threat of Japanese aggression was a constant source of worry to British defence planners as Britain needed to maintain strong naval links with the Empire and if necessary defend its outposts.
The role of the United States is vital in understanding the whole issue of appeasement. Eden felt it was futile to try to reach agreement with the dictators. The best way to avoid war, in his opinion, was to involve the US alongside Britain in the Far East. If there were a European war, the US would automatically be committed as Britain’s ally. He felt that all should be sacrificed to the objective of Anglo-American co-operation and actively sought Roosevelt’s support.
Chamberlain on the other hand wanted to steer British policy more in the direction of appeasement in Europe and expected little from the United States. It was Chamberlain who sent a cold answer to Roosevelt’s suggestion for an international conference. Eden took offence as he had been trying to encourage American involvement. Tensions between the two men mounted.
Eden and Chamberlain were both concerned with rearmament but Chamberlain was primarily worried about growing costs. In December 1937 Eden expressed his concern on this matter.
At the start of 1938, the international situation was becoming increasingly tense. Hitler was putting pressure on Austria to accept the union, or Anschluss, between Germany and Austria. Chamberlain was prepared to recognise Italy’s conquest of Abyssinia (Ethiopia) to keep Italy as an ally in order to isolate Germany. Chamberlain’s cabinet ‘agreed that every effort must be made to come to an arrangement with Italy’ (catalogue reference: CAB 23/92 f255). Eden found this unacceptable and resigned. Lord Halifax replaced him as Foreign Secretary.
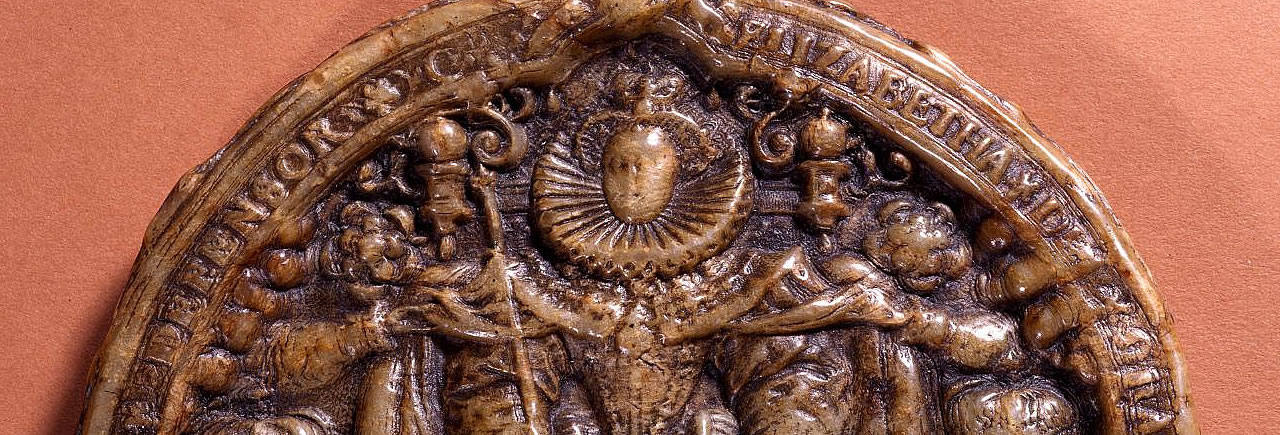
Seals were used on most documents in the past to ‘close’ them and to prove that the document really was from the person who sent it. Most seals had an image of the owner and a motto or legend around the edge. It would usually show the type of job the owner did and contain information about their family.
However, a Great Seal was special as it belonged to the monarch and was attached to all important documents which specifically came from the monarch. If a document had this seal on it, it had the monarch’s ‘seal of approval’ and reflected their wishes or commands. The seal used in this lesson is the Second Great Seal of Queen Elizabeth I.
The Great Seal can reveal important clues about the way a monarch wished to be seen by their subjects and the responsibilities that they had. Elizabeth I wanted to create an image of herself that would impress her subjects. Find out and see if you think she succeeded.
What can it tell us?A seal was created by pressing an engraved metal die or matrix into a mixture of resin and beeswax to create an impression to make the seal.
The Great Seal was used by the Chancery, the Tudor Civil service, to show that the document attached was ordered in the Queen’s name. Elizabeth I had her own personal ‘privy’ [private] seals for documents which she personally approved aswell. When a King or Queen died, the matrix was destroyed. The punishment for illegal copying of the Great Seal was death.
The matrix for this seal was produced by the artist Nicholas Hilliard in 1586. It took around two and a half years to produce the Second Great Seal of the Realm. The document used in this lesson was dated 1584 and the extracts from it explain why Queen Elizabeth requested the creation of a new Great Seal and reveals how it was made. Designs for the matrix, according to the source, had been made ‘upon parchment by you our servant Hilliard’ to begin with. The Queen agreed that these should be engraved in silver and ‘bringe to perfection ready to be used with all convenient speede suche a new Greate Seale’.
Great Seals come in a number of different colours, though they darken with age as with this example. Nearly all English great seals show on the front or obverse, the monarch sitting on their throne with the orb and sceptre, symbols of their authority. On the reverse they are usually shown riding a horse as a military leader and defender of the kingdom.
Elizabeth I took the cultivation of her image very seriously. Part of the way that she maintained her authority over the English nobility and her ambitious courtiers was through elaborate rituals and performance. She was given names like Astraea, a goddess from Greek mythology, or Gloriana, a character in poet Edmund Spencer’s The Faerie Queene. Portrait painters were given special “face patterns” by the government in order to make ensure that pictures of Elizabeth reflected her preferred image. Hilliard produced some of these patterns, however he is most famous for his ‘portrait miniatures’, tiny images of Elizabeth or members of her court. In the 1580s wearing miniatures of the queen became very fashionable and a sign of loyalty. Like the Great Seal and large scale portraits, these miniatures were highly effective instruments of propaganda.
Outside London few people would have known what the Queen looked like, although Elizabeth and her Court travelled across southern England and East Anglia on ‘progresses’ which allowed more people to catch sight of her. Before the internet, radio, television or newspapers and with a population who could mostly neither read nor write the Great Seal allowed Elizabeth’s image to be visible throughout her kingdom.